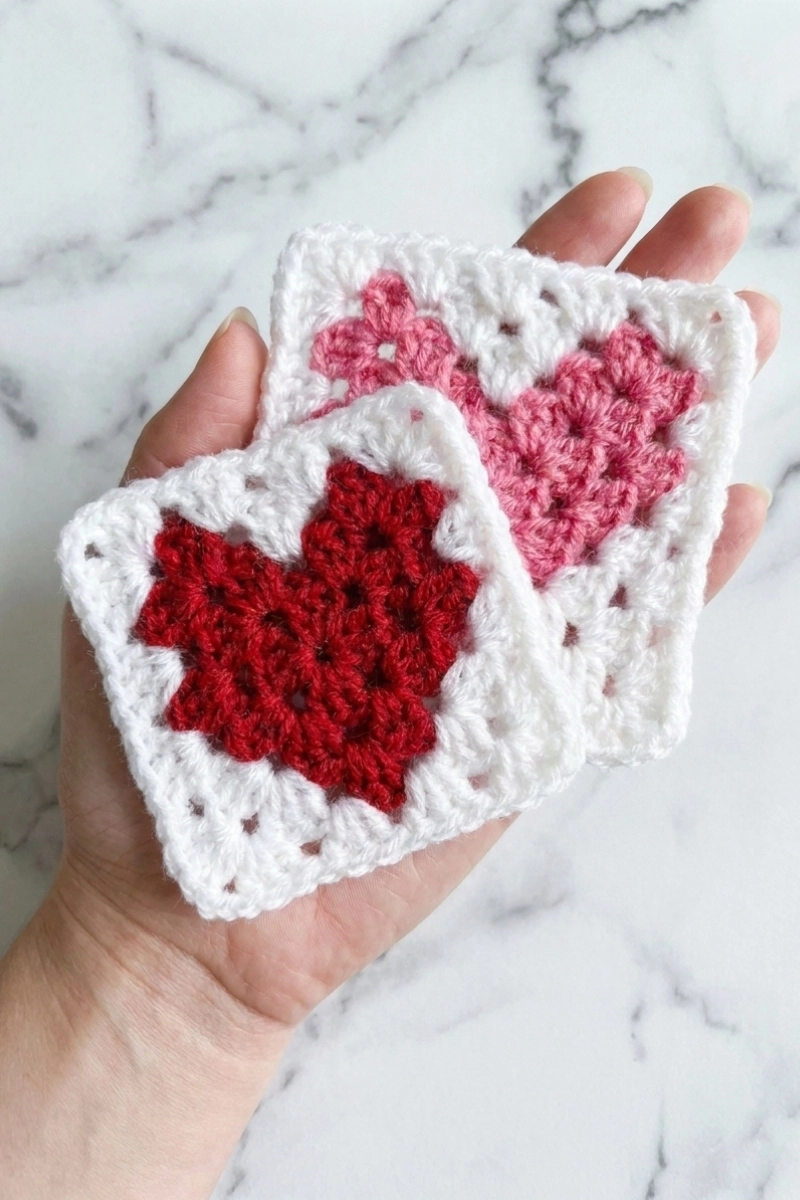
A heart granny square takes the cozy, old-fashioned square we all grew up loving and gives it a sweet little romantic makeover. A handful of thoughtful color changes is really all it takes to turn a plain granny into something that feels a bit more heartfelt, and the best part is that it works up easily no matter where you are on your crochet journey.
There’s just something about a simple stitch forming a shape that carries meaning. This little heart square has quickly become one of my favorites to make because it feels extra thoughtful. It’s wonderful for baby blankets, Valentine’s gifts, or really any moment you want to tuck a tiny bit of love into a finished piece.
Granny squares have this lovely timeless quality to them. They’re one of those patterns that just never seems to fade out of fashion. I can still remember working on a giant granny square blanket when I was first learning to crochet, and even after all these years I still find myself drawn to all the fun variations you can make from that one basic building block.
Every time I pick up a granny square pattern it honestly feels like slipping into a comfy sweater. I know the rhythm, I know the shape, I know exactly what to expect. And this heart version is such a charming little twist on a classic I already adore.
If the basic granny square is already in your toolkit, then honestly you’re pretty much there. The familiar beat of double crochet clusters and chain spaces forms the bones of this square. All we’re really doing is sneaking in a few color changes at just the right moments to shape a heart that shows up right in the middle.
Like any granny square, these little hearts are hugely adaptable. Stitch up a whole pile and join them into a blanket, use them as the front of a pillow, string a bunch together for a cute Valentine’s banner, or pop one or two into a baby blanket for a thoughtful touch. A single square can become so many different things depending on your mood.
The construction follows that same classic pairing of chains and double crochet clusters worked into the gaps between stitches, which is exactly why it stays beginner-friendly. Most rounds flow in that comfortable granny pattern you already know, with just a couple of rounds where you’ll want to pay a little extra attention so the heart forms properly.
It’s pretty incredible how such a small adjustment to a familiar stitch pattern can produce something that feels entirely fresh. And I have a feeling this heart square is going to earn a permanent spot in your rotation of favorites.
Materials
- Worsted Weight Yarn:
- 12 to 18 yards white
- 10 to 13 yards red or pink
- US H 8/5.00 mm Crochet Hook, or whatever hook size pairs nicely with your chosen yarn
- Tapestry Needle and scissors for finishing touches
Crochet Abbreviations
- ch = chain
- dc = double crochet
- sl st = slip stitch
- st = stitch(es)
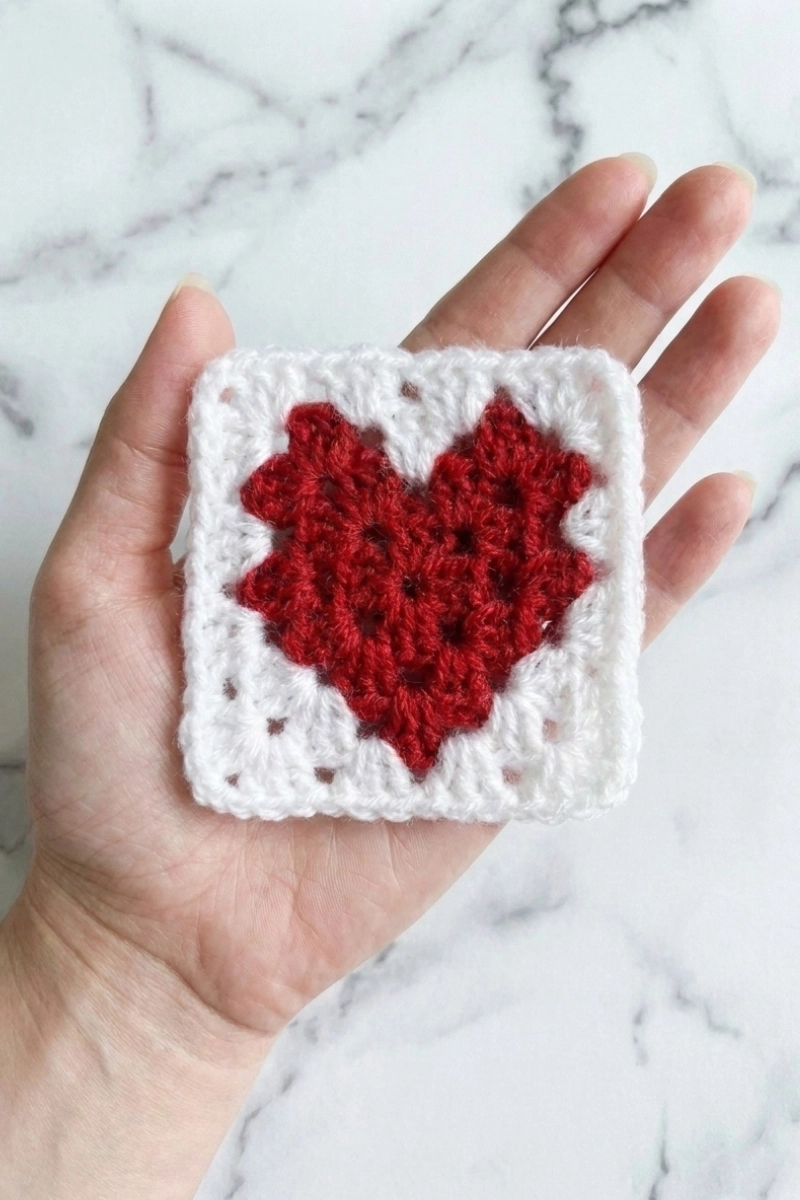
Small Heart Granny Square Pattern
With red, ch 4 and join with a sl st to the 1st ch to form a ring.
R1: Work all in the ring: Ch 3 (counts as 1st dc), 2 dc, ch 2, *3 dc, ch 2. Repeat from * 2 more times. Sl st to top of starting ch-3 to join.
R2: Sl st to next ch-2 space, then (ch 3 (counts as 1st dc), 2 dc, ch 2, 3 dc) into same space, *(3 dc, ch 2, 3 dc) into next corner space. Repeat from * 2 more times. Sl st to top of starting ch-3 to join.
Starting with the next round, you’ll be switching colors. Snip the yarn at each color change rather than carrying strands across. Later on when you weave the ends in, keep each tail tucked into the matching color section so everything stays nice and tidy on the back.
R3: Staying with your red yarn, sl st to next ch-2 corner space, (ch 3 (counts as 1st dc), 2 dc, ch 2, 3 dc) into same space, 3 dc into next space, switching to white yarn in the last dc. With white yarn, (3 dc, ch 2, 3 dc) into next corner space, switching to red yarn in the last dc. With red yarn, 3 dc in the next space, switching to white yarn in the last dc. With white yarn, (3 dc, ch 2, 3 dc) into next corner space, switching to red yarn in the last dc. With red yarn, 3 dc in the next sp, (3 dc, ch 2, 3 dc) into next corner space, switching to white yarn in the last dc. With white yarn, 3 dc in the next space. Sl st to top of starting ch-3 to join. Fasten off white yarn.
R4: Reattach white yarn to any corner sp. (Ch 3 (counts as 1st dc), 2 dc, ch 2, 3 dc) into same corner space, 3 dc into each of the next 2 sp, *(3 dc, ch 2, 3 dc) into the corner space, 3 dc into each of the next 2 sp. Repeat from * twice. Sl st to top of starting ch-3 to join. Fasten off white yarn.
Gently weave in all the yarn tails, tucking each one into stitches of the matching color so they disappear cleanly.
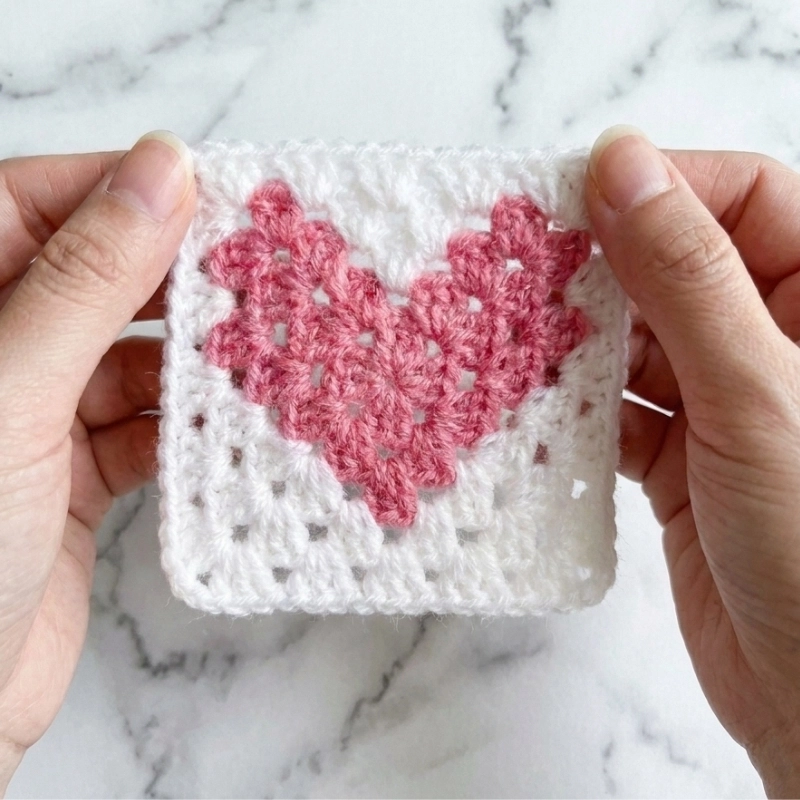
Large Heart Granny Square Pattern
With pink yarn, ch 4 and join with a sl st to the 1st ch to form a ring.
R1: Work all in the ring: Ch 3 (counts as 1st dc), 2 dc, ch 2, *3 dc, ch 2. Repeat from * 2 more times. Sl st to top of starting ch-3 to join.
R2: Sl st to next ch-2 space, (ch 3 (counts as 1st dc), 2 dc, ch 2, 3 dc) into same space, *(3 dc, ch 2, 3 dc) into next space. Repeat from * 2 more times. Sl st to top of starting ch-3 to join.
Starting with the next round, you’ll begin switching colors. Snip your yarn at each color change rather than carrying it along. When it’s time to finish, weave each tail into stitches of the same color for a clean and polished finish.
R3: Continuing with pink yarn, sl st to next ch-2 corner space, (ch 3 (counts as 1st dc), 2 dc, ch 2, 3 dc) into same space, 3 dc into next space, switching to white yarn in the last dc. With white yarn, (3 dc, ch 2, 3 dc) into next corner space, switching to pink yarn in the last dc. With pink yarn, 3 dc in the next space, switching to white yarn in the last dc. With white yarn, (3 dc, ch 2, 3 dc) into next corner space, switching to pink yarn in the last dc. With pink yarn, 3 dc in the next sp, (3 dc, ch 2, 3 dc) into next corner space, switching to white yarn in the last dc. With white yarn, 3 dc in the next space, switching to pink yarn in the last dc. Sl st to top of starting ch-3 to join.
R4: Continuing with pink yarn, sl st to next ch-2 corner space, (ch 3 (counts as 1st dc), 2 dc, ch 2, 3 dc) into same corner space, 3 dc into next space, switching to white yarn in the last dc. With white yarn, 3 dc in next sp, (3 dc, ch 2, 3 dc) into next corner space, 3 dc in the next 2 sp, (3 dc, ch 2, 3 dc) into next corner space, 3 dc in next space, switching to pink yarn in the last dc. With pink yarn, 3 dc in the next space, (3 dc, ch 2, 3 dc) into next corner space, switching to white yarn in the last dc, 3 dc in the next 2 spaces. Sl st to top of starting ch-3 to join. Fasten off white yarn.
R5: Reattach white yarn to any corner sp. (Ch 3 (counts as 1st dc), 2 dc, ch 2, 3 dc) into same corner space, 3 dc into each of the next 3 sp, *(3 dc, ch 2, 3 dc) into the corner space, 3 dc into each of the next 3 sp. Repeat from * twice. Sl st to top of starting ch-3 to join. Fasten off white yarn.
