There’s something magical about a houseplant that never needs watering, always looks perfect, and comes in colors nature never imagined. This lavender purple monstera plant combines the trendy split-leaf silhouette with a dreamy purple palette that works beautifully in any room. I designed this crochet pattern after falling in love with the oversized fenestrated leaves and wanting something that felt more whimsical than traditional green.
This project looks intricate, but I promise it’s completely doable. If you can work basic stitches in the round and follow shaping instructions, you have everything you need. The individual components are simple. The magic happens when you assemble them together.
Let me walk you through creating your own forever plant from start to finish.
Why You’ll Love This Crochet Monstera Pattern
This crochet monstera plant makes a stunning statement piece without any of the fuss of real tropical plants. No humidity requirements. No brown leaf tips. No guilt when you forget about it for months.
The lavender purple colorway gives this classic houseplant shape a modern, artistic twist. You could easily adapt this pattern using greens for a realistic look, but there’s something special about a purple monstera sitting on your desk or bookshelf.
Each leaf uses the same basic construction method with slight variations in size. Once you make your first leaf, the rest flow quickly. The stems work up fast in continuous rounds, and the decorative pot cover adds that finished, polished look.
Materials You’ll Need
Yarn:
- Worsted weight yarn (medium weight, category 4) in three shades of purple: light lavender, medium purple, and deep plum
- Approximately 150 yards of each purple shade
- Small amount of light gray or cream for the pot cover (approximately 100 yards)
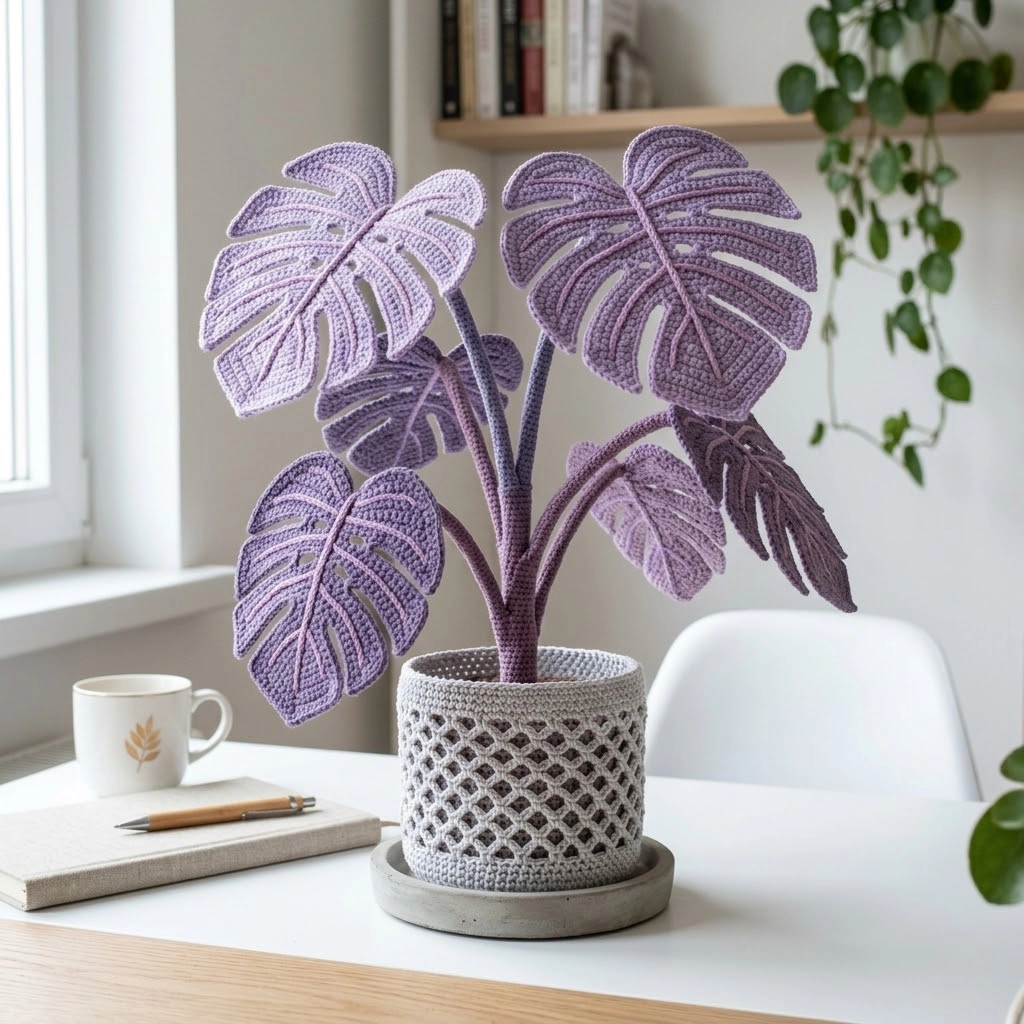
The leaves in the image show a beautiful gradient effect, moving from lighter lavender tones to deeper purple shades. I recommend choosing three purples within the same color family for cohesion.
Hook:
- 4.0mm (G/6) crochet hook for leaves and stems
- 5.0mm (H/8) crochet hook for the pot cover
Notions:
- Floral wire (18 gauge) for leaf structure and stems
- Wire cutters
- Tapestry needle
- Stitch markers
- Polyester fiberfill for stems
- Small pot or container (approximately 4 to 5 inches diameter) to place inside the crochet cover
- Floral foam or weighted base material
- Scissors
Skill Level
Intermediate beginner to intermediate. You should be comfortable with:
- Working in rows and rounds
- Increasing and decreasing
- Reading stitch counts
- Basic shaping
If you’ve made amigurumi or crocheted flat motifs before, you’re ready for this crochet tutorial.
Abbreviations and Stitch Definitions
Let me define every stitch before we begin. I’ll use these abbreviations throughout the step by step instructions.
Ch = Chain: Yarn over, pull through loop on hook. This creates your foundation and adds height.
Sl st = Slip stitch: Insert hook, yarn over, pull through both loops at once. Used for joining and surface details.
Sc = Single crochet: Insert hook, yarn over and pull up a loop (two loops on hook), yarn over and pull through both loops. Your basic short stitch.
Hdc = Half double crochet: Yarn over, insert hook, pull up a loop (three loops on hook), yarn over and pull through all three. Slightly taller than sc.
Dc = Double crochet: Yarn over, insert hook, pull up a loop, yarn over and pull through two loops, yarn over and pull through remaining two loops. Creates a taller, more open fabric.
Inc = Increase: Work two stitches into one stitch from the previous row or round. Adds width.
Dec = Decrease (invisible decrease for amigurumi): Insert hook through front loops only of next two stitches, yarn over, pull through both, yarn over, pull through two loops. Reduces width cleanly.
FLO = Front loop only: Work into only the front loop of the stitch, leaving the back loop unworked.
BLO = Back loop only: Work into only the back loop of the stitch.
Gauge
Exact gauge is not critical for this decorative project. My leaves measured approximately 6 to 8 inches tall using worsted weight yarn and a 4.0mm hook. Your tension may vary slightly without affecting the final result.
The Monstera Leaf Pattern (Make 5 to 7)
Each monstera leaf has two identical halves that you join together with a wire sandwiched between for structure. The characteristic splits and holes come from strategic chain spaces and careful shaping.
Leaf Half (Make 2 Per Leaf)
Foundation:
Ch 25.
Row 1: Sc in 2nd ch from hook, sc in next 23 ch. (24 sts)
Row 2: Ch 1, turn. Sc in first st, sc in next 22 sts, 2 sc in last st. (25 sts)
Row 3: Ch 1, turn. 2 sc in first st, sc across to last st, 2 sc in last st. (27 sts)
Row 4: Ch 1, turn. Sc in first 8 sts, ch 3, skip 3 sts (this creates the first fenestration or split), sc in next 5 sts, ch 3, skip 3 sts (second split), sc in remaining 8 sts. (21 sc, 6 ch)
Row 5: Ch 1, turn. Sc in first 8 sts, 3 sc in ch-3 space, sc in next 5 sts, 3 sc in ch-3 space, sc in last 8 sts. (27 sts)
Row 6: Ch 1, turn. Sc in first 6 sts, ch 5, skip 5 sts (larger split), sc in next 5 sts, ch 5, skip 5 sts, sc in last 6 sts. (17 sc, 10 ch)
Row 7: Ch 1, turn. Sc in first 6 sts, 5 sc in ch-5 space, sc in next 5 sts, 5 sc in ch-5 space, sc in last 6 sts. (27 sts)
Rows 8 to 10: Ch 1, turn. Sc across, decreasing 1 st at each end. (21 sts after Row 10)
Row 11: Ch 1, turn. Dec, sc to last 2 sts, dec. (19 sts)
Row 12: Ch 1, turn. Dec, sc to last 2 sts, dec. (17 sts)
Rows 13 to 16: Continue decreasing at each end every row until 9 sts remain.
Row 17: Ch 1, turn. Dec, sc in next 5 sts, dec. (7 sts)
Row 18: Ch 1, turn. Dec, sc in next 3 sts, dec. (5 sts)
Row 19: Ch 1, turn. Dec, sc 1, dec. (3 sts)
Row 20: Ch 1, turn. Sc3tog (insert hook in first st, pull up loop, insert hook in second st, pull up loop, insert hook in third st, pull up loop, yarn over, pull through all 4 loops). (1 st)
Fasten off, leaving a long tail for seaming.
Creating the Leaf Veins
This is what gives the monstera its realistic texture. Using the same color or a slightly contrasting shade, you’ll add surface slip stitches.
Center vein: Starting at the base of the leaf half, surface slip stitch in a line from bottom to top, following the center of the piece.
Side veins: Create 4 to 6 diagonal lines branching from the center vein toward the outer edges. These should angle upward toward the leaf tip.
The image shows beautifully defined veins in a slightly darker purple. Take your time here. These details make the finished leaf look professional.
Assembling Each Leaf
1. Place two completed leaf halves wrong sides together.
2. Cut a piece of floral wire approximately 12 inches long.
3. Sandwich the wire between the halves, running from the base up through the center.
4. Using your tapestry needle and matching yarn, whip stitch around the entire outer edge, joining the halves together.
5. Leave approximately 4 inches of wire extending from the base. This becomes your stem attachment point.
Pro tip: Block your leaf halves before joining if they’ve curled. A quick steam or wet blocking flattens them nicely.
The Stem Pattern (Make 5 to 7)
The stems work in continuous rounds around the wire, creating a sturdy, realistic look.
Using medium or dark purple yarn and your 4.0mm hook:
Ch 2.
Round 1: 6 sc in second ch from hook. Do not join. Place a stitch marker in the first stitch and move it up as you work. (6 sts)
Round 2: Sc in each st around. (6 sts)
Rounds 3 to 40: Continue working sc in each st around, maintaining 6 sts per round.
The stem length varies depending on where each leaf will sit in your arrangement. Make stems between 4 and 8 inches long for variety. Longer stems for leaves that will sit higher, shorter for lower leaves.
To close: Stuff the stem lightly with fiberfill as you work, inserting the wire from the leaf down through the center. Sl st in next st, fasten off.
The Decorative Pot Cover
The pot cover in the image features a gorgeous lattice or mesh design that adds texture and visual interest. This open stitch pattern works up quickly and stretches to fit various pot sizes.
Using gray or cream yarn and your 5.0mm hook:
Base:
Ch 4, sl st to join into a ring.
Round 1: Ch 1, 8 sc in ring, sl st to join. (8 sts)
Round 2: Ch 1, 2 sc in each st around, sl st to join. (16 sts)
Round 3: Ch 1, *sc in next st, 2 sc in next st*, repeat around, sl st to join. (24 sts)
Round 4: Ch 1, *sc in next 2 sts, 2 sc in next st*, repeat around, sl st to join. (32 sts)
Round 5: Ch 1, *sc in next 3 sts, 2 sc in next st*, repeat around, sl st to join. (40 sts)
Continue increasing rounds until base fits the bottom of your pot.
Sides with lattice pattern:
Round 1: Ch 3 (counts as dc), dc in each st around, sl st to top of ch-3 to join. (40 sts)
Round 2: Ch 5, skip 2 sts, *dc in next st, ch 2, skip 2 sts*, repeat around, sl st to 3rd ch of beginning ch-5.
Rounds 3 to 8: Ch 5, *dc in next dc, ch 2*, repeat around, sl st to join.
Top border:
Round 9: Ch 1, sc in each dc and 2 sc in each ch-2 space around, sl st to join.
Round 10: Ch 1, sc in each st around, sl st to join. Fasten off.
Final Assembly
Now comes the satisfying part. Putting everything together.
1. Prepare your base: Place floral foam or a weighted material inside your pot. This anchors the stems.
2. Attach stems to leaves: Wrap the wire extending from each leaf around the top of each stem. Secure with a few stitches of matching yarn if needed.
3. Arrange your plant: Insert each stem into the floral foam, positioning leaves at various heights and angles. Real monstera plants have leaves facing different directions, so vary your placement.
4. Slide the pot cover over your container. The lattice stretches slightly to accommodate different sizes.
5. Adjust and fluff. Bend wires gently to achieve natural-looking curves. Fan out leaves so they don’t overlap awkwardly.
Tips for Success
Color choices matter. The gradient effect in this pattern comes from using multiple purple shades across different leaves. Make some leaves in light lavender, some in medium purple, and a few in deep plum for depth.
Wire gauge affects stiffness. If your leaves flop, try thicker wire. If they feel too rigid, go thinner.
Block your pieces. Flat, crisp leaf halves join together more neatly.
Take breaks on the veins. Surface slip stitch detailing can strain your hands. Work one leaf at a time rather than doing all the veins in one session.
Pattern Variations to Try
Once you’ve mastered this how to crochet monstera tutorial, consider these adaptations:
- Classic green palette with deep forest, sage, and lime
- Variegated look using self-striping yarn
- Mini version with sport weight yarn and smaller hook
- Single statement leaf mounted in an embroidery hoop
Wrapping Up Your Crochet Monstera Plant
This lavender purple monstera plant crochet pattern brings together simple techniques to create something truly eye-catching. The individual components are beginner friendly, while the finished piece looks like it belongs in a boutique.
I hope this step by step crochet tutorial gave you everything you need to create your own purple monstera. There’s nothing quite like gifting yourself a gorgeous houseplant that asks nothing of you except a little yarn and patience.
Thank you so much for choosing this pattern. I genuinely appreciate you spending your making time here with me.
I would absolutely love to see your finished plants. Tag me on Instagram or share in our Facebook group. Seeing your purple monsteras, or whatever wild colors you choose, honestly makes my whole day.
Happy crocheting, friend. Now go make something beautiful that never needs watering.
