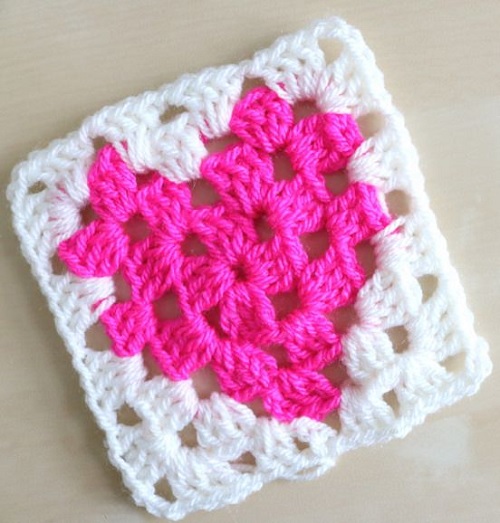
Looking to add something special to your granny square collection? This love heart design is absolutely perfect for beginners who want to tackle something with a bit more personality than the standard square. The pattern uses basic stitches and straightforward color changes, making it totally achievable for anyone who can read a crochet pattern.
The best part? You only need two yarn colors and a hook that matches your yarn weight. Follow along with the step-by-step instructions, and you’ll have a charming motif ready to join into blankets, pillows, or standalone projects.
Related Articles
- 11 Dog Bandana Free Crochet Patterns
- 10 Tie-Up Back Crochet Top Free Patterns
- 17 Ten Minutes Valentine’s Day Free Crochet Patterns
1. Round 5 – The Final Layer

This final round brings everything together and gives your square its finished edges. Work in your contrasting color throughout, adding those signature corner chains and spacing your stitches evenly. Once you join and weave in your ends, you’re done!
2. Round 3 – Introducing the Second Color
This is where the heart design really starts to show itself. You’ll alternate between your two colors, creating that lovely contrast that makes the motif pop. Pay attention to your color changes — they’re what give this square its unique character and charm.
3. Round 1 – Starting Your Square
Begin with your first color and create a magic ring or chain ring. Work your double crochets and corner chains to establish the foundation. This round sets up the whole pattern, so take your time getting those corners nice and even.
4. What You’ll Need
Grab two contrasting yarn colors — pink and white work beautifully, but feel free to mix any shades you love. A 6mm hook is perfect for medium-weight yarn, but choose your hook size based on the yarn you’re using. That’s really all there is to it!
5. Round 4 – Building Dimension
Switch to your second color and keep it going through the rest of the pattern. This round adds more width and depth to your square, building on the color work you started in the previous round. Your stitches are getting more spacious, creating that classic granny square look.
6. Round 2 – Establishing the Shape
Stick with your first color and increase your stitches to create those important corners. Work the same stitch pattern in each corner space — this consistency keeps your square looking neat and balanced as it grows outward.